Pollinate Hope
Manufacturing a gift for moms, dads, and grads to support pollination
Product Design / Prototyping / Manufacturing
How might we manufacture a small-batch of sustainable gifts to support declining pollinator populations?
Pollinate Hope is a hand-made, locally sourced planting kit designed for sustainability. We exist to support sustainable and intentional growth for both people and the environment. We plant with purpose; renewing our New England home with natural pollinators.
Our hand-made kits are packed with the ingredients and tools needed to grow new plants for our local pollinators. With each seed planted, comes a new intention for the future and a moment of grounding. Together we will take action towards a more sustainable future.
Problem.
According to the USDA, pollinators are responsible for one in every three bites of food we take. We rely drastically on this nearly invisible ecosystem and evidence indicates that it is being threatened. Pollinator populations are declining due to climate change, pesticides, and a loss of habitat and food sources.
Project Requirements.
Our team wanted to build a product to address this problem. We developed a solution for our course in Integrated Design and Management.
According to our creative brief, the solution needed to be a gift for parents and/or graduates. The team needed to produce 30 units and sell them in a 2-week time window.
Process.
Discover | Define | Develop | Deliver
My Role.
Project Manager.
I led an interdisciplinary team of three with backgrounds in engineering, design, and business to design, develop, test, manufacture, and sell 30 units. I managed project execution and played a versatile role to support all tasks.
Duration.
2.5 months
Discover.
To begin ideation, we defined our guiding principles for the product, conducted user research with parents and students, and performed market research to identify opportunities. Through multiple ideation sessions, we defined four potential concepts and prioritized the options based on desirability, feasibility, and viability. With additional user and stakeholder feedback, our team aligned on one idea for further refinement.
Methods & Tools.
Guiding Principles
Ideation Sessions
Market Research
User Research
Customer Personas
Sketching
Miro
Ideation.
By defining guiding principles, the team conducted research to identify and assess market opportunities.
Team Guiding Principles.
To start the first ideation session, we established five principles to guide our work: sustainability, functionality, quality, uniqueness, and sentimental.
As we conducted market research to identify opportunities and brainstorm product ideas, the team used our guiding principles to inform potential gift ideas.
Opportunity Assessment.
Through multiple ideation sessions, the team aligned on five potential products and conducted a desirability, feasibility, and viability assessment to prioritize the options. We tested our ideas with stakeholders and potential users to gather feedback. Using that input, we selected and refined the planting kit concept.
Define.
After selecting the planting kit idea, our team further refined the concept. I sketched concepts and developed low-fidelity prototypes to gather feedback. Using the feedback collected, I defined product features and mapped the customer journey to illustrate the planting kit experience for customers.
Methods & Tools.
Secondary Research
Sketching
Low Fidelity Prototyping
User Testing
Journey Mapping
Feature Identification
Sketches & Low-Fidelity Prototypes.
With our selected concept, we began sketching ideas to bring the planting kit concept to life and build alignment with our team about the product.
We developed quick prototypes to test our potential planting kit ideas and gather rapid feedback from potential users. I built three rapid, low fidelity prototypes to test.
User feedback led our team to design a smaller rectangular wooden planter that would hold the planting cups at home and carry tea bag-style seed packets. This design offered customers something tangible to keep at home that could serve as a multi-purpose tool in the future.

This is a prototype of a larger box that is used for planting the seeds. The top of the box is a card from the gift giver that can be slid out and kept on a table.
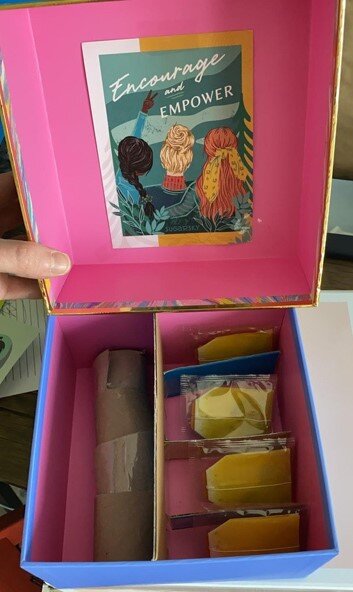
This prototype represents a hefty cardboard box that has specific spaces for planting cups and seeds. The lid lifts off the box and holds a removable card from the gift giver.

This prototype represents a large planting kit that comes in a hefty cardboard box. The top lifts up to show a card from the gift giver, starter cups for planting and heart-shaped seed holders for each pollinator.

This prototype is a small planting kit that can easily fit in your hand with seed packets designed to look like tea bags. When opening the box, users would see a card from the gift giver.
Product Journey.
I defined the user journey to clarify the product and customer experience.
I conducted desk research to learn more about local pollinators and understand how to better support pollinator populations.
With this knowledge, our team defined our product concept, clarifying the product components and features.
With this information, I mapped the desired customer journey to illustrate the planting kit experience.

Develop.
With the refined concept, the team prototyped and tested each component of our design (i.e., wooden planter, seed cards, seed packets, and informational cards) to develop our product. With each component defined, we manufactured 30 units to sell.
Methods & Tools.
Medium & High-Fidelity Prototyping
Quality Assurance
Wood Joiner & Planar
Table, Band, & Circular Saw
Wood Gluing & Clamping
Drill Press
CNC Router
Belt Sander
Mineral Oil
Cricut
Wooden Planter Development.
Our team developed medium and high fidelity wooden prototypes of the planter, testing build methods for feasibility and designs for desirability.
#1: Medium-Fidelity Prototype.
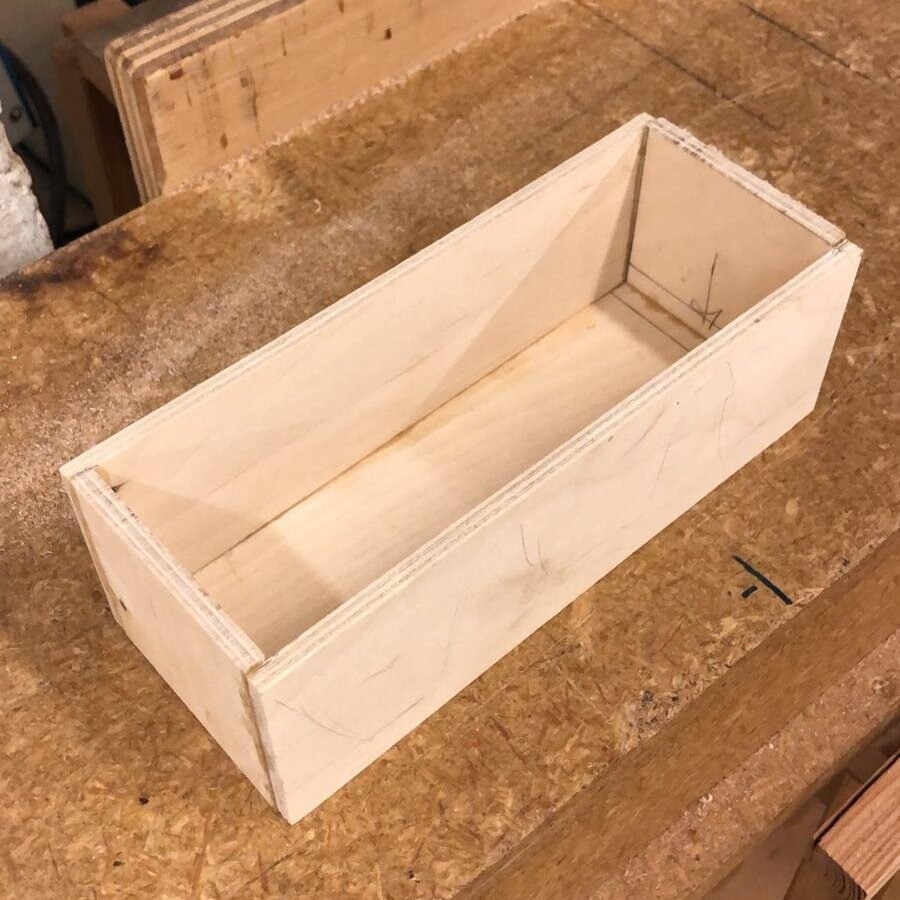
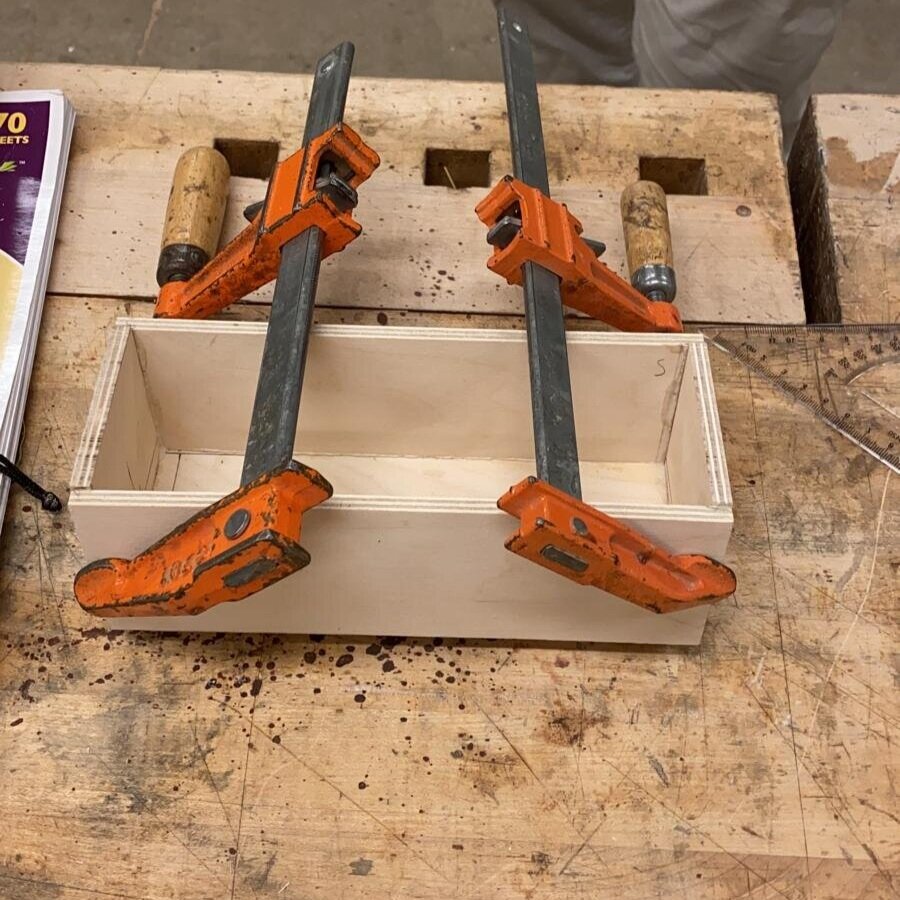
I built our first wooden prototype with a teammate; a five-sided box design glued together along the sides. Through this process, we learned that this design would not be feasible for manufacturing 30 units. Small human errors were easily recognizable and negatively impacted planter aesthetics.

#2: Medium-Fidelity Prototypes.
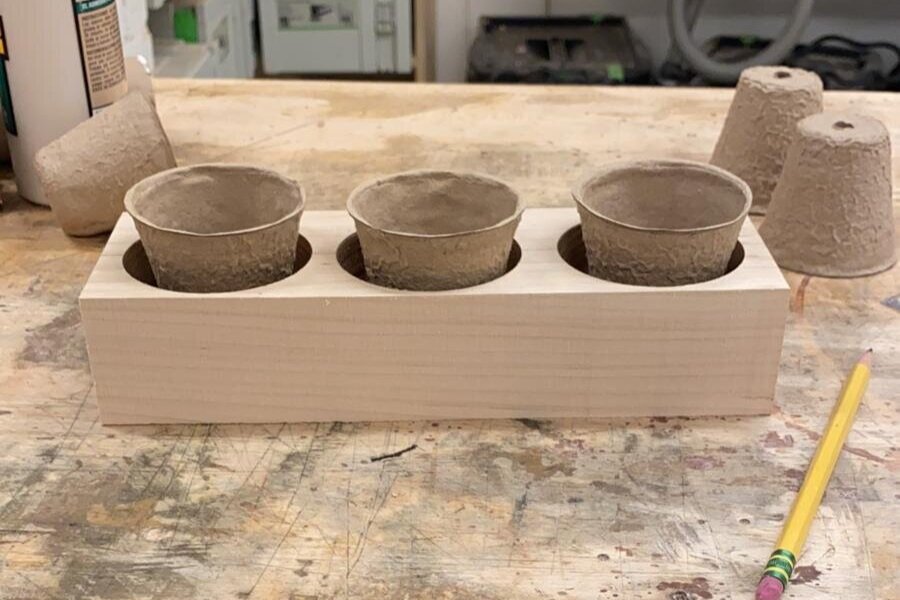
In an effort to reduce the likelihood and impact of human error, we tested another design using a drill bit to place three holes in a solid piece of wood. We found this design to be more feasible and aesthetically pleasing. However, we wanted to iterate the design to make it more unique.

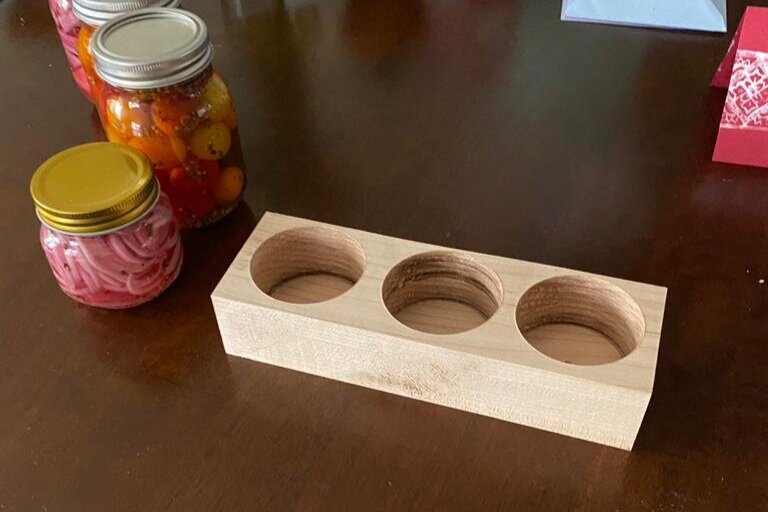
#3: High-Fidelity Prototypes.
In our third test, we used the CNC router to create a more unique design that connected the three holes into a wave-like shape. In order to use the CNC machine, we needed a taller piece of wood. After ideating on the design, we decided to try a two-toned wooden planter design.
With this new design, we created two prototypes, one with the CNC router and another with the drill bit. We learned that the CNC router design took three times as long to make compared to the drill bit version.
In our user testing, we learned that users liked both designs. However, they would be willing to spend more for the CNC router version.


#4: Production.
Given both time constraints on the CNC router, especially given COVID-19 restrictions, and pricing considerations, our team decided to produce both styles. This allowed us to deliver on time and offer a selection of planting kits at different price points to meet user needs.
In addition to local lumber yards, we purchased wood from a small-scale mill just south of Boston that sourced wood from the property. Our team selected a variety of local, high quality woods to create four different color varieties: walnut cherry, walnut cedar, tiger maple cherry, and tiger maple cedar.
Each wood was selected to create a beautiful contrast of colors; red cedar was unique and delightful, walnut was rich and dark, tiger maple was light, refreshing, and unique with it’s flame-like stripes, and cherry was a warm and medium balance.
The team worked together to manufacture 30 units within one week. This included three steps: (1) planing and joining the wood, (2) cutting and gluing the wood pieces together, and (3) preparing for and performing drilling and CNC routing.
#5: Quality Assurance & Finishing.
I conducted quality assurance to ensure each product met the specified dimensions using saws and sanding tools. Each product was further sanded until smooth. Then each planter was oiled with mineral oil. This was selected because it is an eco-friendly, non-toxic, and odorless product that brought out the natural beauty in the grain. This step required multiple coats over a number of days, as the wood continued to soak in the oil.
Card Development.
I worked with my teammate to develop pollinator cards to explain the purpose behind the seeds, outline the seeds included, and provide information to care for the seeds.
#1: Prototyping Designs.
I worked with my teammate to create and test low, medium, and high fidelity card prototypes for aesthetics, comprehension, and feasibility. After brainstorming a number of ideas, our team selected a heart shaped card to bring a feeling of love and care into the gift.
I conducted secondary research into the pollinators and seeds to create the card content. We tested these cards with MIT students to gather feedback on comprehension. Through these tests, we learned that the sun, water, and temperature variables and scales were unclear. Additionally, we heard that the text was cramped and difficult to read.
In the iterated version, changed the symbols to include sun and soil with a clear description, and we reduced the text on the card for readability.
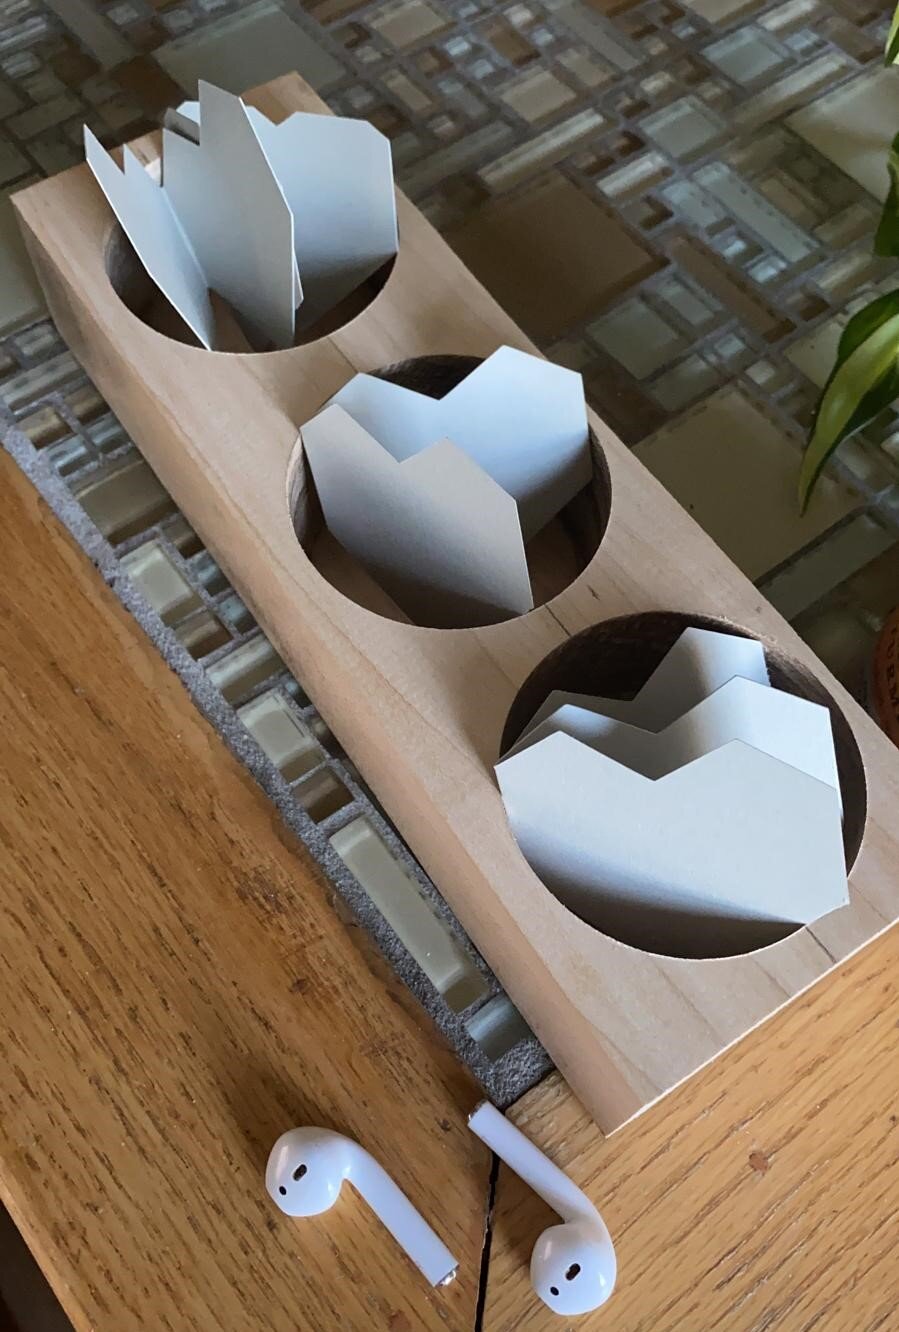

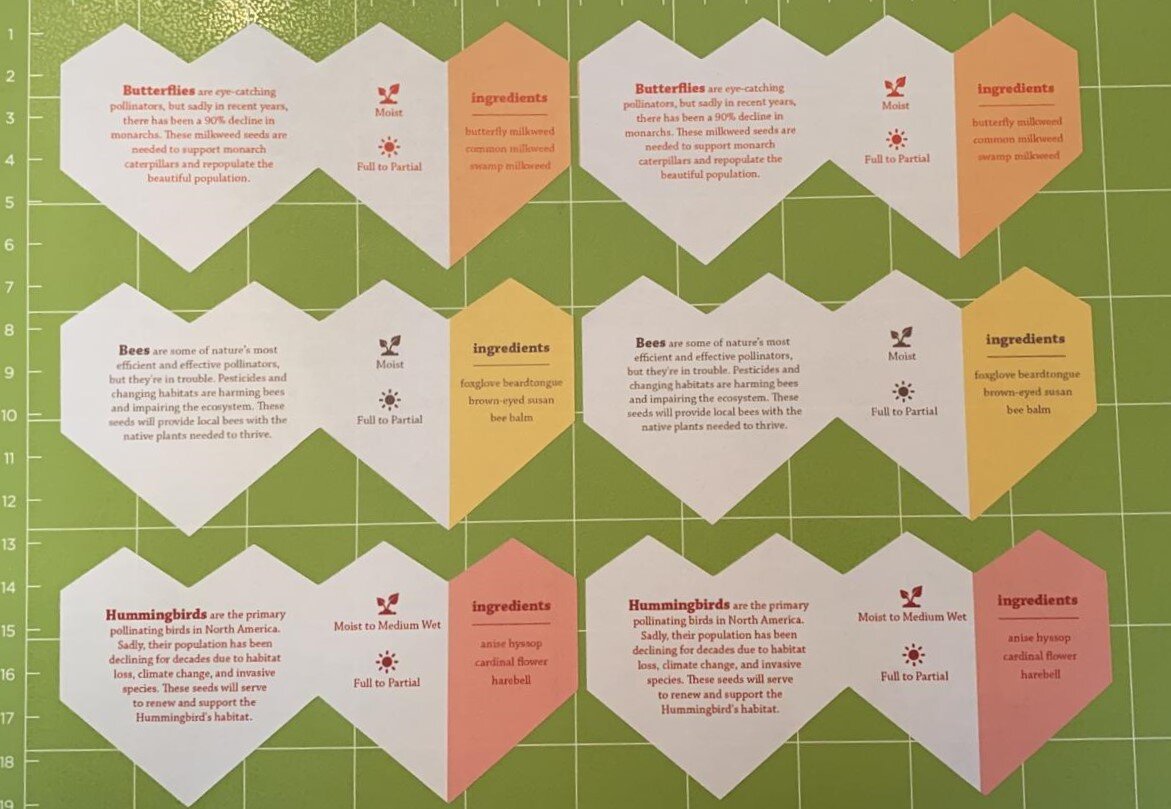
#2: Producing Cards.
I manufactured 90 cards with support of my team. I used a cricut machine to quickly cut each card; a process that required multiple tests and iterations. After the cards were cut and folded, my teammate and I stamped each card with the respective pollinator and drew a space for intention setting.
Seed Packet Development.
I managed seed acquisition and packaging, leading card development and seed packing processes for timely delivery.
Packing Assembly.
After identifying and ordering seeds for three pollinator populations, I developed and managed our team’s processes for efficiently packing our seed packets. With my teammate, I created 90+ seed packages.
Deliver.
Towards the end of development, our team began marketing our product to customers at MIT and beyond. I worked with my team to organize a photoshoot, develop our Instagram account, and build a website for sales. During this effort, I managed our packaging process to deliver 30 units.
Methods & Tools.
Marketing
Packaging
Order Fulfillment
Photography
Shopify
Instagram
Marketing.
To support our team’s marketing efforts, I worked with our team to build our online presence.
Social Media & Website.
Our team facilitated a photoshoot to take photos that captured the beauty of our product. With this new material, I created an Instagram account and developed assets to share our product and build support for our mission. For sales, my teammate built a website, and I worked on developing the site to quickly showcase our product, share our mission, and tell our team’s story.


Packaging.
I managed our team’s product compilation and packaging process to fulfill 30 customer orders.
Packaged with Love.
Our team designed our packaging to make the product feel natural and sustainable. We created an assembly line with each component prepared for consolidation. Together, our team packaged and fulfilled 30 orders, delivering to customers locally and via shipping.
Impact.
Sustainability Award.
Our product won a sustainability award for being “Best for the Planet.”
Donated 56% of Sales.
We successfully sold all units, earning $1,800 in sales and $900 in profits. The team donated $500 to the Wild Seed Project Non-Profit to further support our mission.


